The Complete First Timer’s Guide to Climbing Mount Rinjani
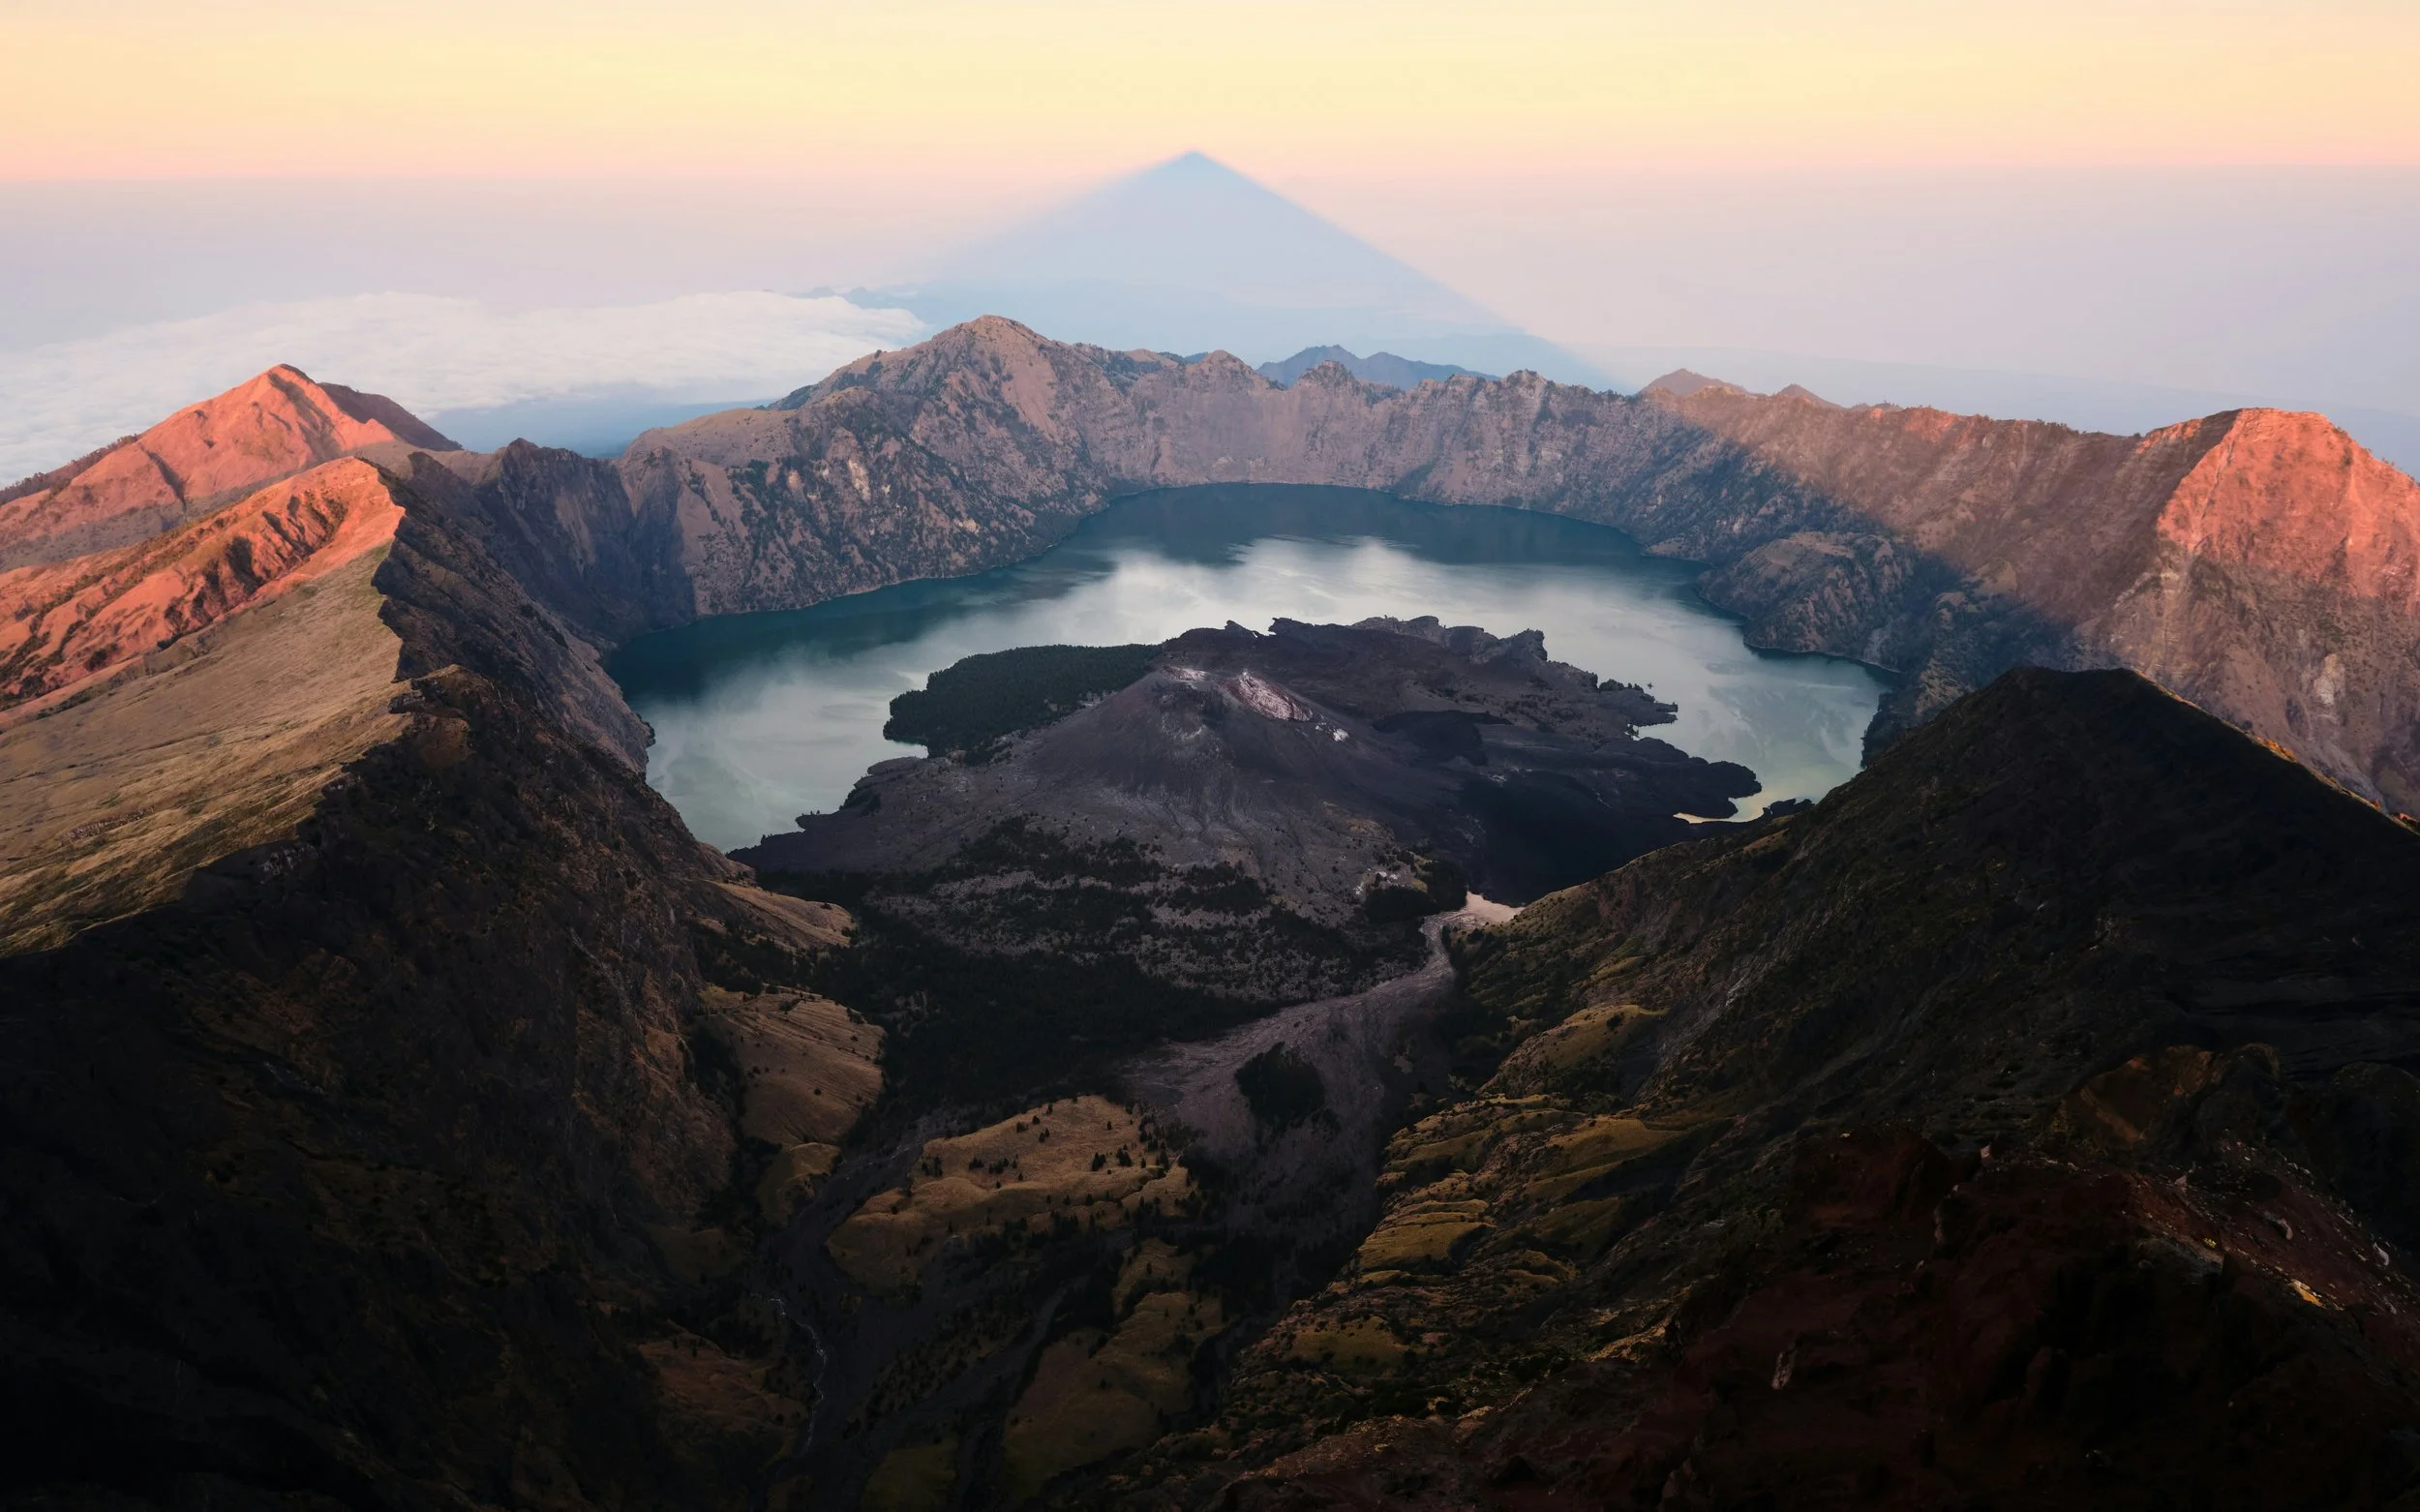
Planning to climb Mount Rinjani for the first time? After completing the trek myself, I've put together this guide to help you prepare for one of Southeast Asia's most rewarding hikes. Inside, you'll find everything from choosing the right itinerary and the best time to visit, to what the campsites are really like and lessons I learned along the way. My goal is simple—to help you come in prepared and enjoy the experience instead of leaving with regrets.
Table of contents
Quick Facts
Is Mount Rinjani Worth It?
How Difficult Is It?
Which Route Should You Choose?
Best Time to Hike
Before You Book
What to Expect During the Trek
Essential Hiking Tips
Campsite & Facilities
Photography Guide
Final Thoughts
Quick facts
Location: Lombok, Indonesia
Elevation: 3,726 metres (12,224 ft)
Difficulty: ★★★★☆ (8/10)
Best Season to Hike: April to October (June to September for the most stable weather)
Park Opening Season: Generally April to December (subject to weather conditions)
Typical Trek Duration: 2D1N, 3D2N or 4D3N
Starting Point: Sembalun or Senaru Village
Summit Temperature: Approximately 0–8°C before sunrise, depending on weather conditions
Can Beginners Climb It? Yes absolutely, provided you have a reasonable level of fitness and prepare beforehand.
Is Mt Rinjani Worth it?
Before climbing Mount Rinjani I’ve heard countless stories from friends about how challenging yet rewarding it was. After experiencing it myself I completely understand why it’s considered one of the best hikes in Southeast Asia. Watching the sunrise from the 3,726m summit while overlooking the Segara Anak Lake and the volcanic creator is something photos can’t do justice and it’s something that I’ll definitely remember for many years to come. .
No doubt the hike itself wasn’t easy or a walk in the park therefore reaching the summit really gave a sense of achievement that I’m proud of. If you’re looking for an adventure that will physically push you while rewarding you with unforgettable views, Mount RInjani is absolutely worth adding to your bucket list.
How difficult is it?
Mount Rinjani is widely regarded as one of the most challenging hikes in Southeast Asia. The difficulty doesn't come from the altitude alone but from a combination of long hiking days, steep ascents, loose volcanic scree and a demanding descent.
If you've previously climbed Mount Kinabalu, expect Rinjani to feel harder. While Kinabalu is steeper in certain sections, Rinjani requires greater endurance and the final summit push can be mentally exhausting due to the loose volcanic sand, where it often feels like you're taking two steps forward and one step back.
Despite these challenges, I would absolutely recommend climbing Mount Rinjani. The breathtaking scenery, unforgettable sunrise, and sense of achievement far outweigh the difficulties, making it one of the most rewarding hikes I've ever completed.
If you're physically active, exercise regularly, and prepare with a few weeks of hiking or stair-climbing beforehand, completing Mount Rinjani is a very achievable. During my trek, I met plenty of first-time mountain hikers who successfully reached the summit.
The most important thing is to hike at your own pace. Go slow, conserve your energy, stay hydrated, and remember that reaching the summit is a marathon, not a sprint.
Which route should you choose?
Mt Rinjani offers several route and itinerary options each providing different experiences depending on your fitness level, available time in Lombok and what you hope you see
2D1N Trek
The 2D1N itinerary is the shortest and the more physically demanding option. The treks begins from Sembalun where you hike to the Crater Rim on the first day before attempting the summit in the next morning. After sunrise you will descend back to the Crater Rim for a short break before descending further to the trail head at Sembalun.
This package is suited for people who are short on time for their stay in Lombok and are primarily interested in reaching the summit
3D2N Trek
The 3D2N itinerary is one of the more popular options that I’ll recommend for most hikers.
The first day follows the same route from Sembalun to the crater rim campsite and after summiting on the second morning you will descend in the crater to Segara Anak Lake where you can relax in the hot springs before camping the night near the lake. The final day you’ll exit the national park via either Senaru or Torean route depending on your package.
This itinerary allows you to explore the spectacular crater lake and volcanic landscape that many 2D1N trekker miss.
4D3N Trek
If you prefer to experience Mount Rinjani at a more relaxed pace, consider the 4D3N itinerary.
The additional day allows for a more gradual trek, giving you extra time to rest between hiking days and making the overall experience less physically demanding. It also lets you spend more time exploring Segara Anak Lake and enjoying the natural hot springs without feeling rushed.
This itinerary is particularly well suited for first-time multi-day hikers or those who are more susceptible to altitude sickness. If you experience altitude-related symptoms after reaching the summit, the extra day provides valuable time to rest and recover at the crater rim before continuing your descent to the lake.
Senaru Route
After visiting Segara Anak Lake, most trekkers will leave the national park via either the Senaru or Torean route.
The Senaru Route is the more common option with the trail passing through dense tropical rainforest with plenty of shade and is considered more straightforward route.
Torean Route
The Torean Route has grown in popularity over recent years and is often regarded as the more scenic route to exit the national park.
Instead of descending entirely through the forest the trail follows river valleys waterfalls, cliffs natural hot springs and greenery that is a different landscape to the Senaru Route. The train is more technical in places with rocky sections and river crossings but many consider the route to be one of the highlight of the trek.
For hikers with good level of fitness, we recommend the 3D2N Sembalun–Torean itinerary. It offers the best balance of challenge, scenery, and overall experience, allowing you to summit Mount Rinjani, visit Segara Anak Lake, and finish your trek via one of the park's most spectacular routes.
That said, be prepared for a physically demanding second day. After reaching the summit and returning to the crater rim, you'll only have a short break before continuing your descent to Segara Anak Lake. Although the scenery is incredibly rewarding, this itinerary involves a long day on the trail and is best suited for hikers who are comfortable with sustained physical effort.
Best Time to Hike Mt Rinjani
Mount Rinjani National Park is generally open from April to December, with the park typically closing during the rainy season between January and March.
Apr – May
April marks the reopening of the park after the rainy season. During this period, the mountain is at its greenest, with lush forests and vibrant landscapes. The trails are generally quieter, making it an excellent time if you prefer fewer crowds. Do note that occasional afternoon showers are still possible, so be prepared for changing weather conditions.
Jun – Aug
June marks the beginning of the peak hiking season and, in my opinion, is one of the best times to climb Mount Rinjani. The weather is usually dry with a low chance of rain, while the trails are noticeably less crowded than in July and August.
By July and August, you can expect clear blue skies, stable weather, and spectacular sunrise views. However, these are also the busiest months, so campsites and trails can become crowded.
Sep – Oct
Many experienced hikers consider September and October another excellent window to climb Rinjani. The weather remains dry and pleasant, while the number of hikers begins to decrease, allowing you to enjoy a quieter experience without sacrificing good conditions.
Nov – Dec
As the wet season approaches, the weather becomes increasingly unpredictable. Expect a higher chance of rain, stronger winds, and cloudier mornings, which may affect summit visibility and sunrise photography.
Before you book
Choose a Reputable Trekking Company
All trekkers are required to hike with a licensed guide. While most trekking companies follow a similar itinerary, the quality of food, camping equipment, guides, and porter services can vary significantly.
When choosing an operator, look beyond the price and consider recent reviews, safety and what's included in the package.
Book Your Trek Early
Mount Rinjani is a national park, and all hikers are required to climb with a licensed guide. During the peak season permit slots can sell out, so it's best to book your tour early. Your trekking company will arrange your climbing permit, guides, porters, meals, camping equipment, and transportation, allowing you to focus on preparing for the hike.
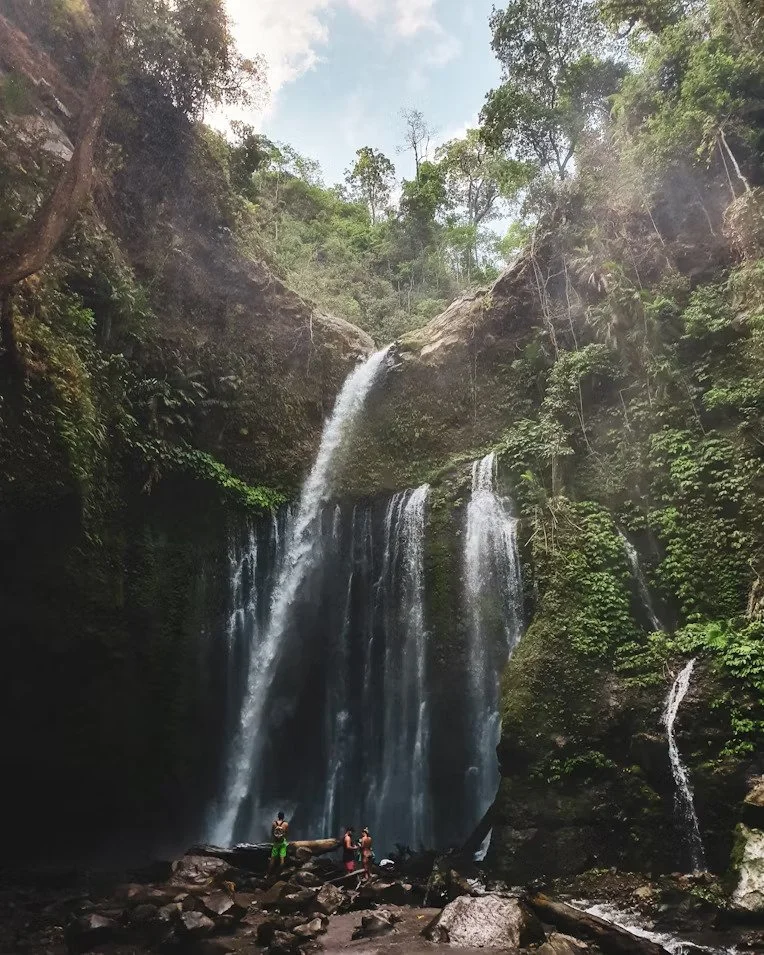
If your trekking operator is based in Senaru, you'll usually spend the night at a hotel before your trek begins. This also gives you the opportunity to visit the beautiful Sendang Gile and Tiu Kelep Waterfalls before or after your climb.
What to Expect During the Trek
Day 1 - Trek to Sembalun Base Camp
The trail begins with a gradual walk from the entrance gate towards Pos 1 and Pos 2. One of the best decisions I made was paying 200,000 IDR to take a mountain bike up to POS 2. I would recommend doing so as the ride was surprisingly fun, and more importantly it allowed me to conserve some energy for the tougher sections higher up the mountain.
At Pos 2 there will be park rangers that will check your bag for prohibited items such as wet tissues and snacks. You may hide these at the bottom of your back as it will not be a detailed bag check.
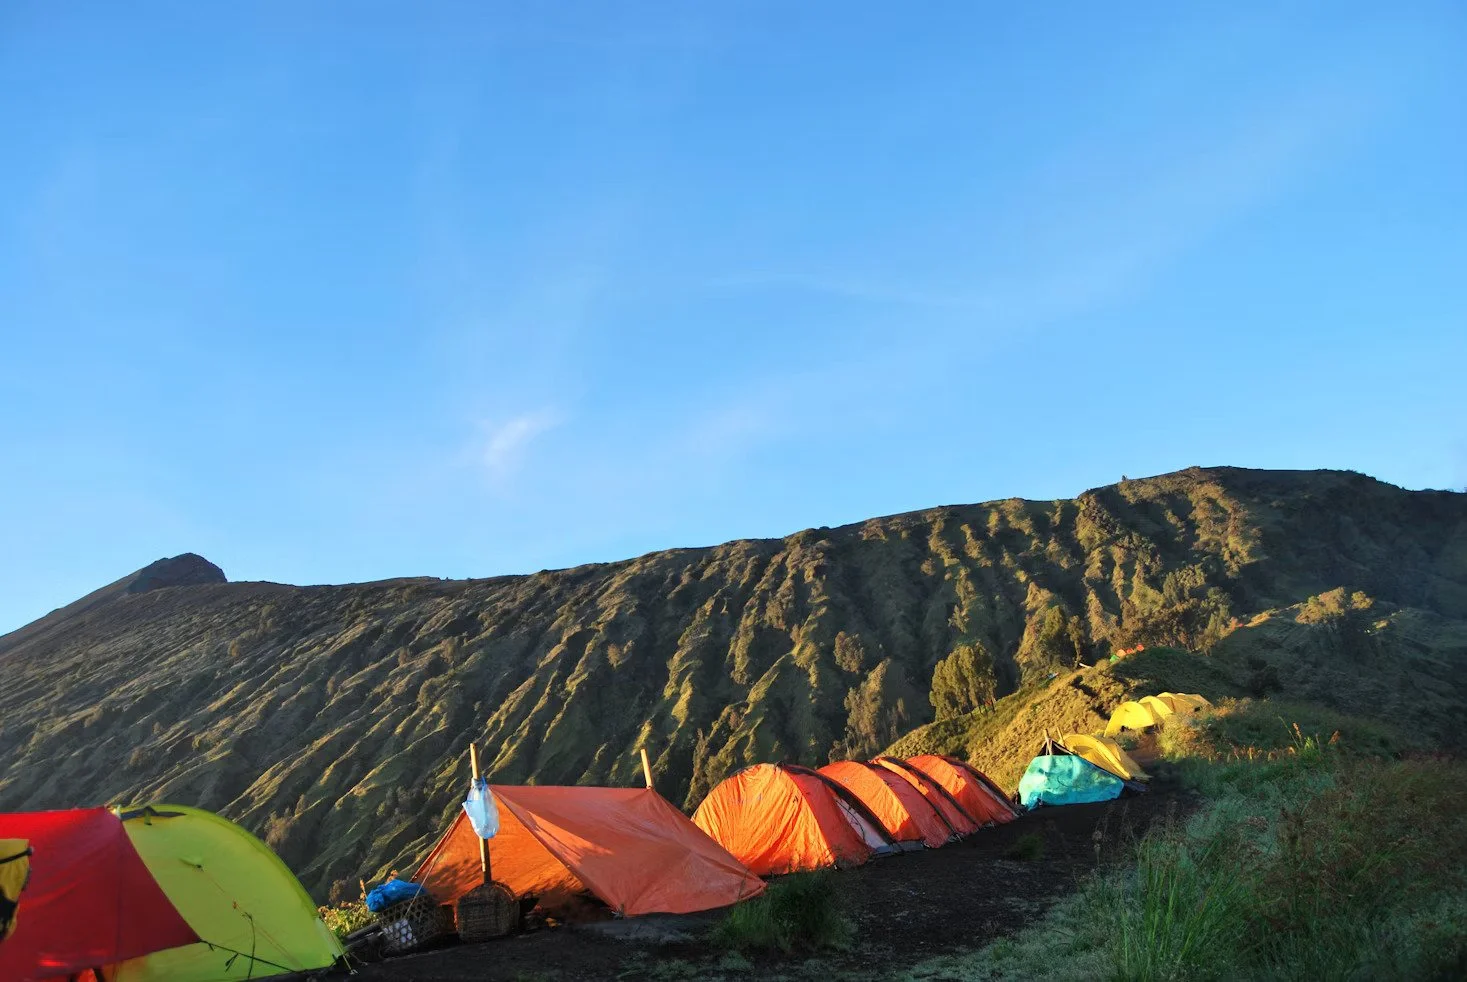
There are several other rest stops positions (Pos) before reaching Sembalun Crater Rim Base Camp. Most groups arrive between 3:00 pm and 5:00 pm, giving you enough time to enjoy the scenery before sunset.
Dinner which is prepared by the porters is typically served around 6:00 pm, after which you'll want to get some rest. Summit day begins early, with most groups waking up between 1:00 am and 1:30 am.
Day 2 - Summit Push
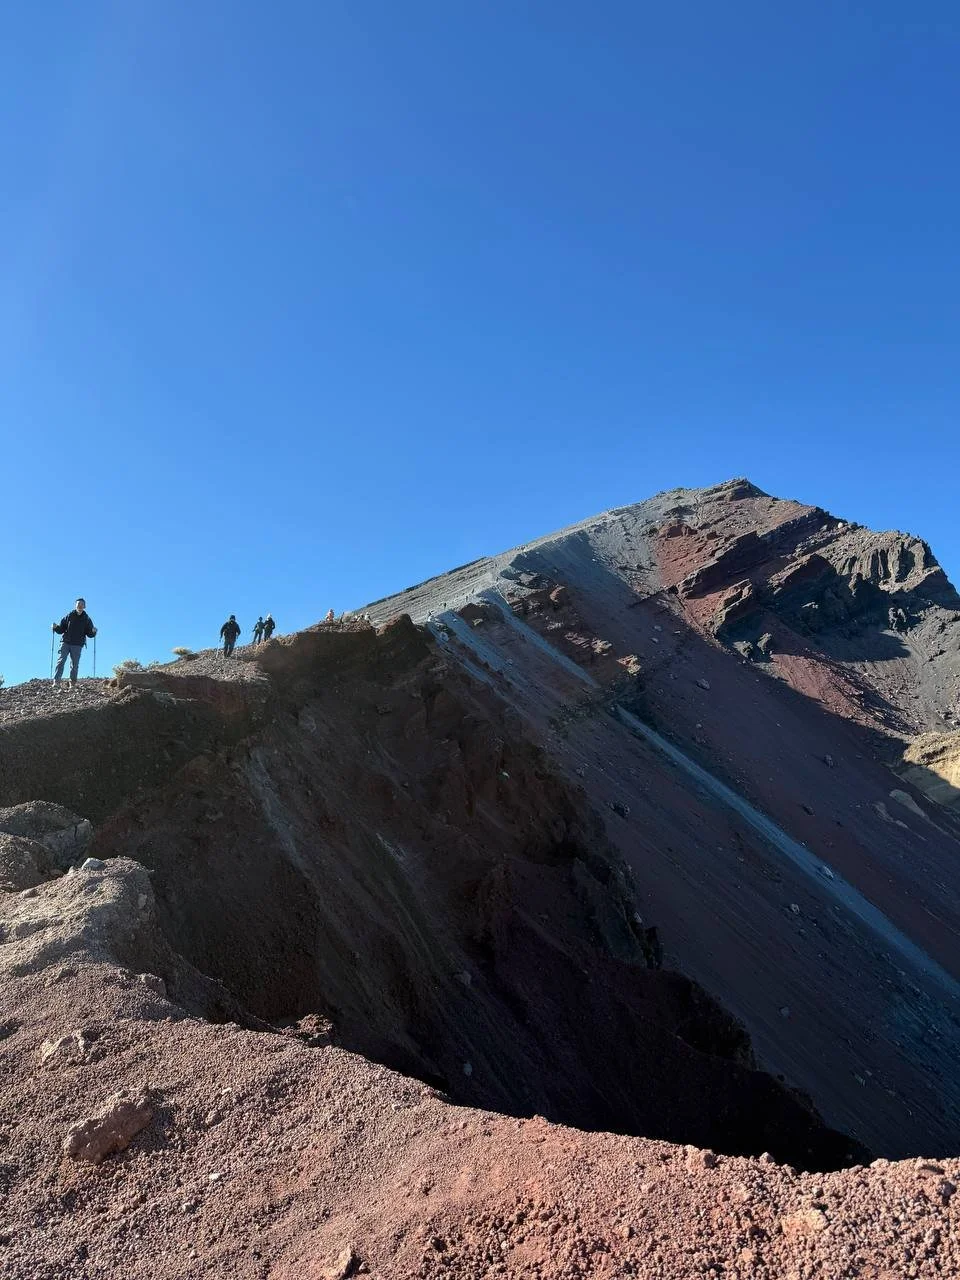
The summit ascent usually starts around 2:00 am and takes approximately 3 to 4 hours, depending on your fitness and pace. The first hour consists of a fairly steep climb with loose rocks and volcanic sand appearing in certain sections. Although challenging, the trail is still relatively manageable. The second section becomes slightly less steep with rolling uphill and downhill terrain. Most hikers move through this portion more quickly and use it to recover before the final climb.
The final section is undoubtedly the toughest part of the entire trek. Often described as taking "two steps forward and one step back," this section features a continuous 40 degrees incline of loose volcanic ash and sand that can make every step feel like you're sliding backwards. Expect this final push to take at least an hour or so and if all goes according to plan, you'll reach the summit around 5:30 am, just in time to witness one of Indonesia's most spectacular sunrises.
At the Summit
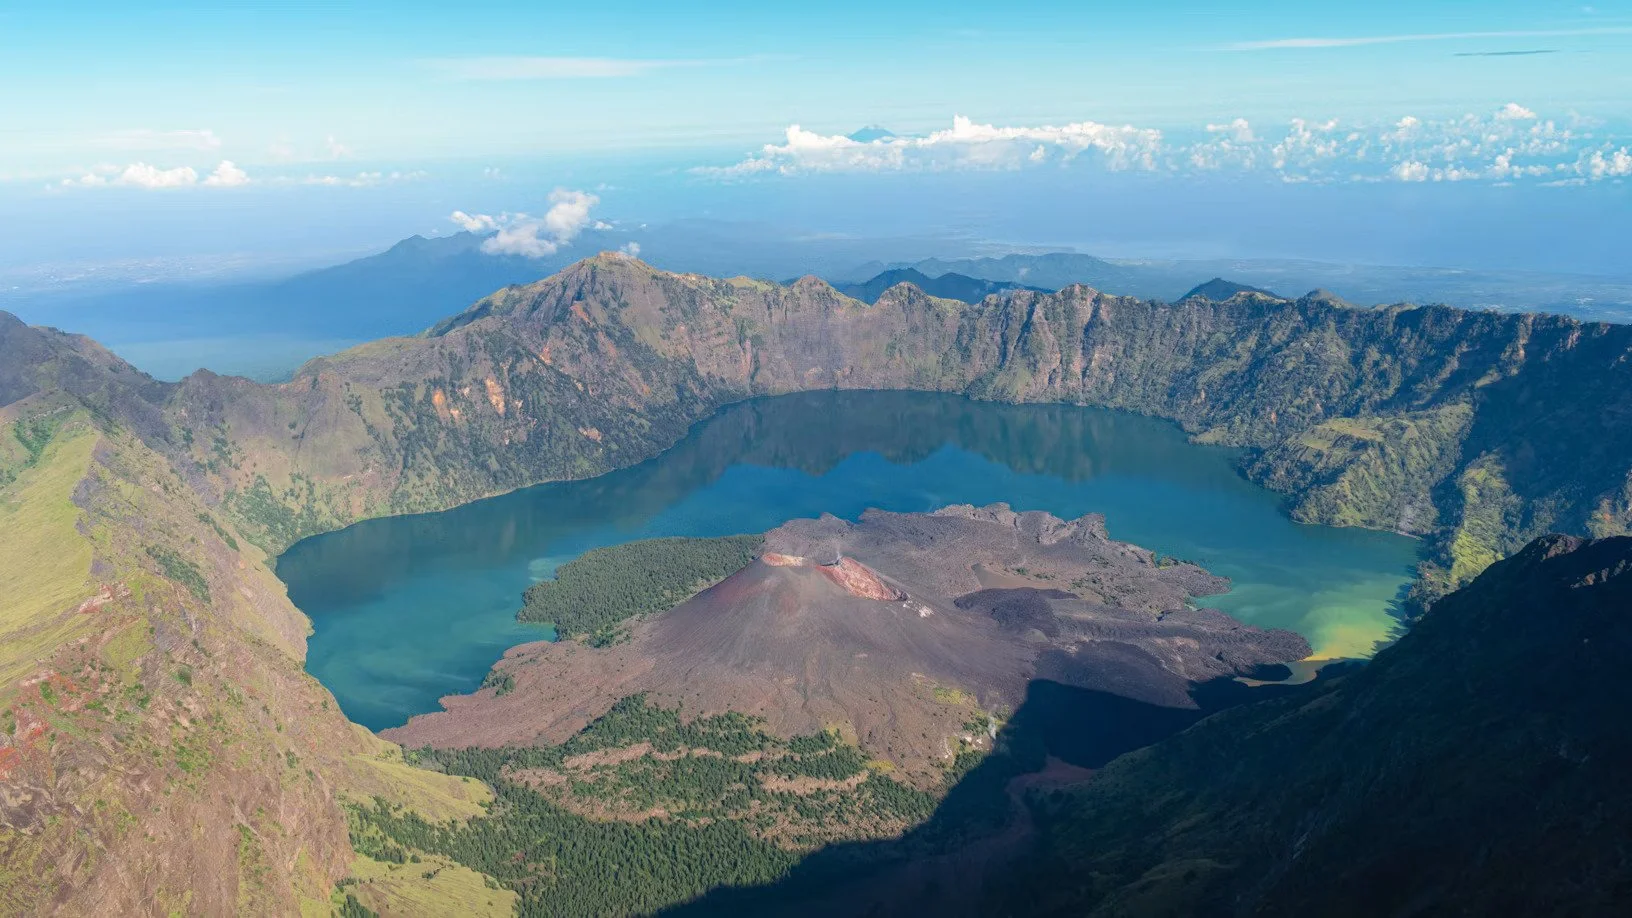
Temperatures at the summit can be surprisingly cold, especially when accompanied by strong winds. Make sure you bring sufficient warm clothing, including gloves and a windproof jacket. If you're unsure what to pack, check out our complete Mount Rinjani Planner which includes a detailed packing list to ensure you don't miss any essentials!
Do note that drone flights are generally not permitted within Mount Rinjani National Park unless you have obtained the necessary approval from the park authorities.
The Descent
While the climb up is physically demanding, many hikers find the descent even more challenging. The loose volcanic sand can be extremely slippery, making good footing essential and I myself have slipped and fall many times during the decend. You can expect to return to Base Camp between 8:00 am and 9:00 am. From there, your itinerary will either continue towards Segara Anak Lake and the hot springs, or you'll begin your descent back towards the trailhead, depending on your trekking package.
Essential Hiking Tips
Prepare for Altitude Sickness
Although Mount Rinjani isn't extremely high compared to the Himalayas, the summit reaches 3,726 metres, and some hikers may experience mild altitude symptoms such as headaches or nausea.
If you've experienced altitude sickness before and you’re prone to experience altitude sickness, consult your doctor before your trip and take medication before climbing. You may opt for the longer itinerary, such as a 4D3N trek, also allows your body more time to rest before moving down to the other campsite.
Bring Sufficient Cash
Carry enough Indonesian Rupiah for optional expenses such as:
Mountain bike ride (IDR 200,000)
Drinks or snacks sold at rest stops
Tips for your guides and porters
As a general guideline, many hikers tip around IDR 200,000 per person, although you're welcome to tip more if you feel your guides and porters have provided exceptional service.
Start Earlier If Needed
If you're concerned about your hiking pace but still want to catch sunrise at the summit, speak with your guide about starting earlier—around 1:00 am instead of 2:00 am. Leaving earlier gives you more flexibility without feeling rushed.
Pace Yourself
One of the best pieces of advice for climbing is to hike slowly but consistently.
Instead of hiking quickly and stopping frequently, find a comfortable rhythm that you can maintain over long periods. Keeping your heart rate under control will help conserve energy for the final summit push.
Personally, I found hiking continuously for 30 to 60 minutes before taking a short water break worked well.
Descending Is Just as Important
Many hikers focus on training for the uphill climb and reaching the summit, but always remember that reaching the summit is optional but decending down the mountain is compulsory, and you have to ensure that after the summit you would have enough in the gas tank to descend down the mountain.
If you're looking to prepare properly for Mount Rinjani, our Mount Rinjani Planner includes a structured 4-week training plan designed to build the strength and endurance needed for the trek. The programme places particular emphasis on strengthening your legs, making both the ascent and, more importantly, the descent significantly more comfortable.
Check it out via the link below if you'd like to head into your climb feeling well prepared.
Invest in Good Hiking Boots
Good footwear makes a huge difference on Mount Rinjani. I completed my trek in a pair of Decathlon hiking boots, which performed adequately on the ascent but struggled for grip during the descent on loose volcanic terrain.
If your budget allows, invest in hiking boots with aggressive tread and excellent traction. You'll appreciate the extra grip when descending steep, sandy slopes. You can find what gear I’ll recommend for Mt Rinjani in our planner as well which contains a curated guide with all the gear I’ll reccomend.
Campsite & Facilities
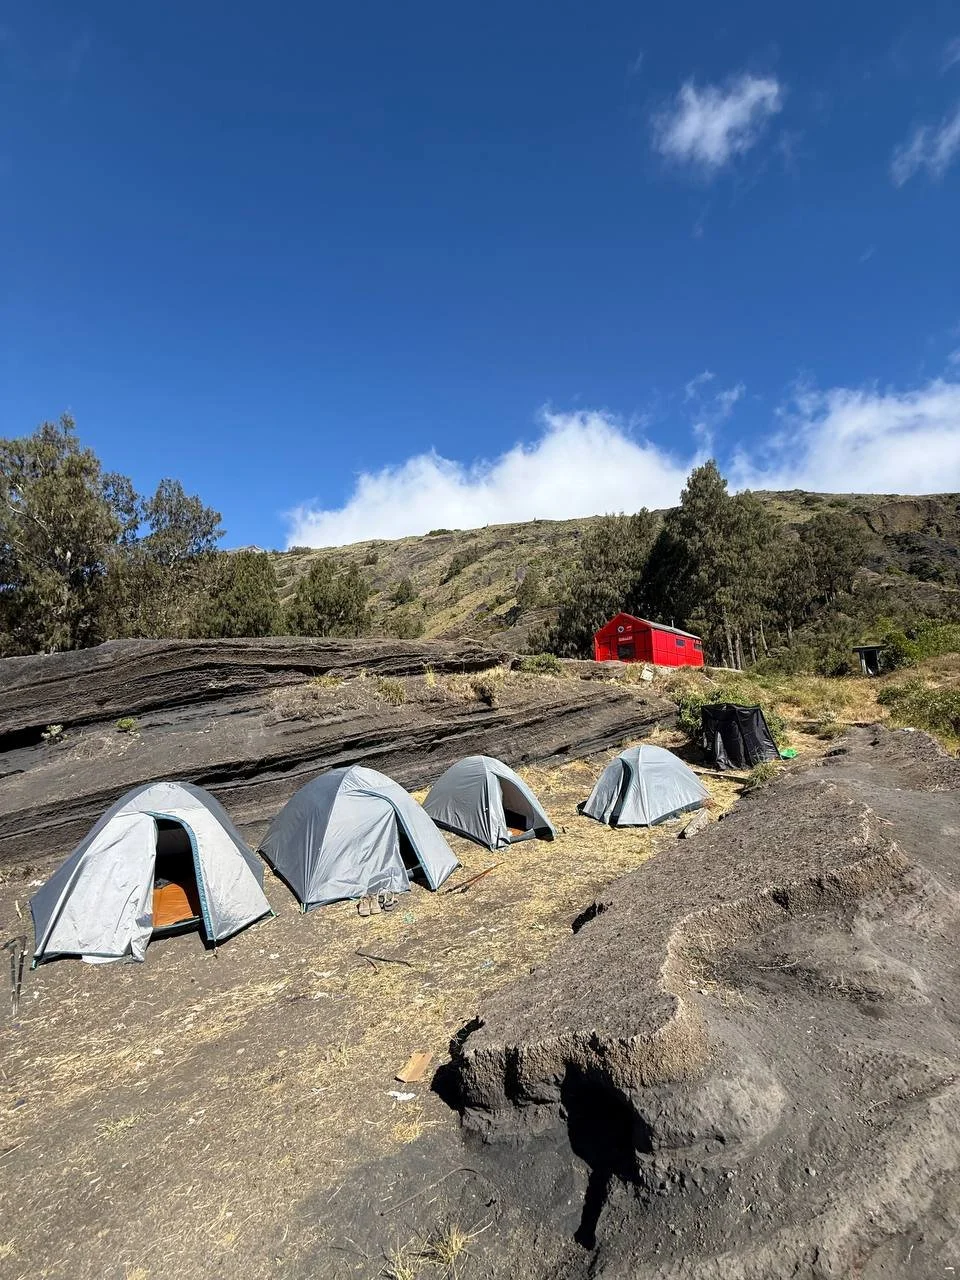
One question many first-time hikers ask is what the toilet situation is like on Mount Rinjani.
At the Sembalun Crater Rim campsite, your trekking company will usually have your tent pitched before you arrive, allowing you to settle in immediately after a long day of hiking.
The toilet facilities, however, are very basic. Unlike mountain huts found in countries such as Japan or Nepal, most trekking companies simply dig a toilet pit in the ground and set up a small privacy shelter around it. After you're done, you'll simply cover your waste with the surrounding soil.
I highly recommend bringing:
Your own toilet paper
Wet wipes
Hand sanitiser
A headlamp if you need to use the toilet at night
What Is the Food Like?
One thing that genuinely surprised me was the quality of the food.
The Indonesian porters are incredible. Despite carrying all the equipment up the mountain, they still manage to prepare freshly cooked meals at every campsite.
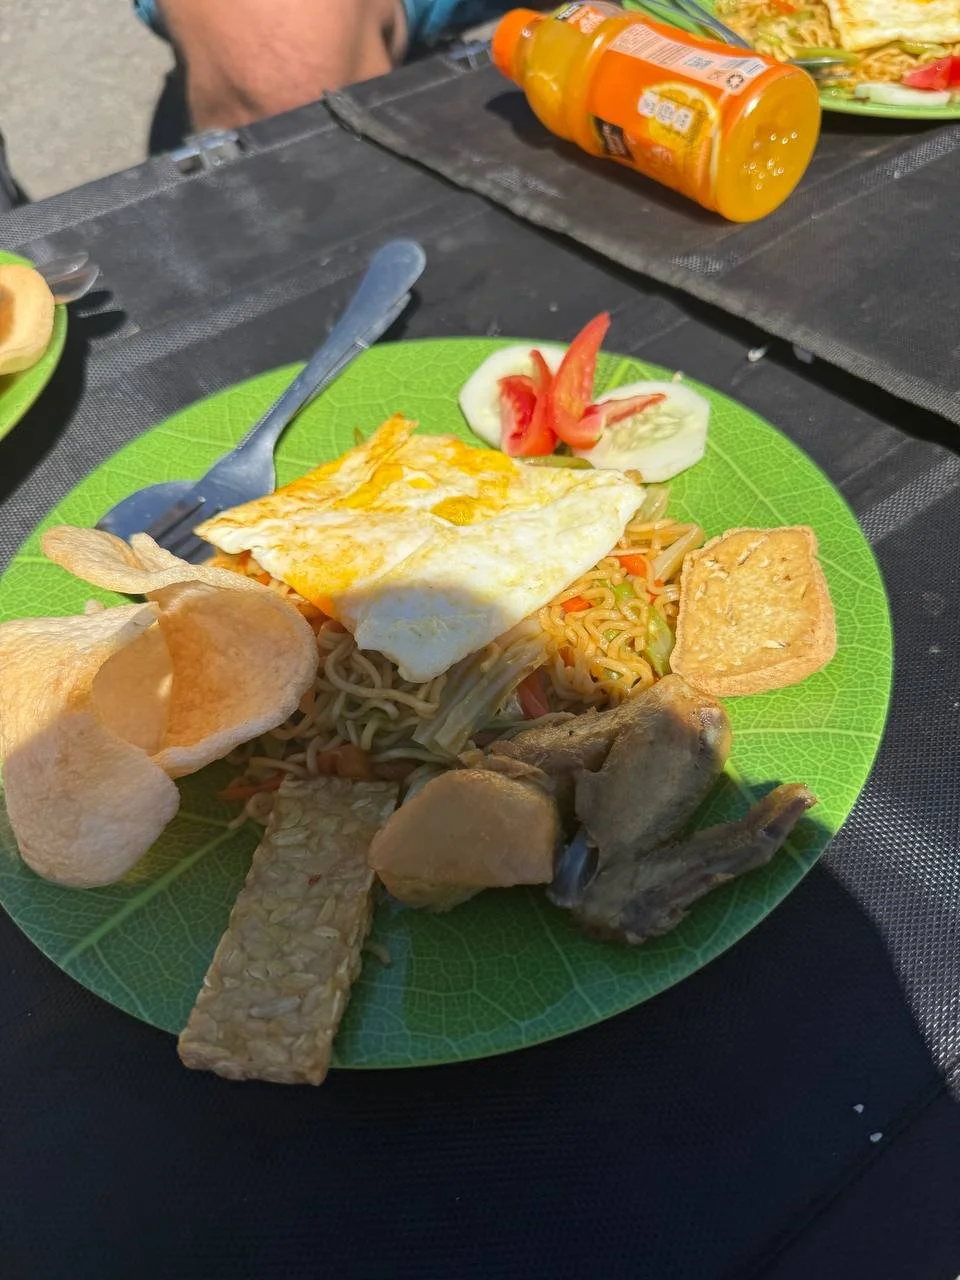
Meals are typically served shortly after you arrive at camp and are accompanied by freshly cut fruit such as watermelon, pineapple, or bananas. Everything—from cooking equipment and ingredients to drinking water—is carried up the mountain by the porters.
Considering the remote location, the meals exceeded my expectations and were one of the highlights of the trek.
If you have any dietary requirements, such as vegetarian, vegan, or halal meals, simply inform your trekking company before the trip.
Internet Signal
If you're wondering whether you'll be able to stay connected, the answer is surprisingly yes—but only in certain sections.
During my hike, I still had mobile reception around Pos 2 and Pos 3. However, once we arrived at the Sembalun Crater Rim campsite, I completely lost signal.
If you're planning to update family members or upload photos, it's best to do so before reaching camp.
Also remember that there are no charging facilities on the mountain, so bring a fully charged power bank if you plan to use your phone or camera throughout the trek.
Photography Guide
If you're into photography, Mount Rinjani offers some of the most rewarding landscapes in Indonesia. Here are some spots where you can capture the best views throughout the hike.
Sembalun Crater Rim
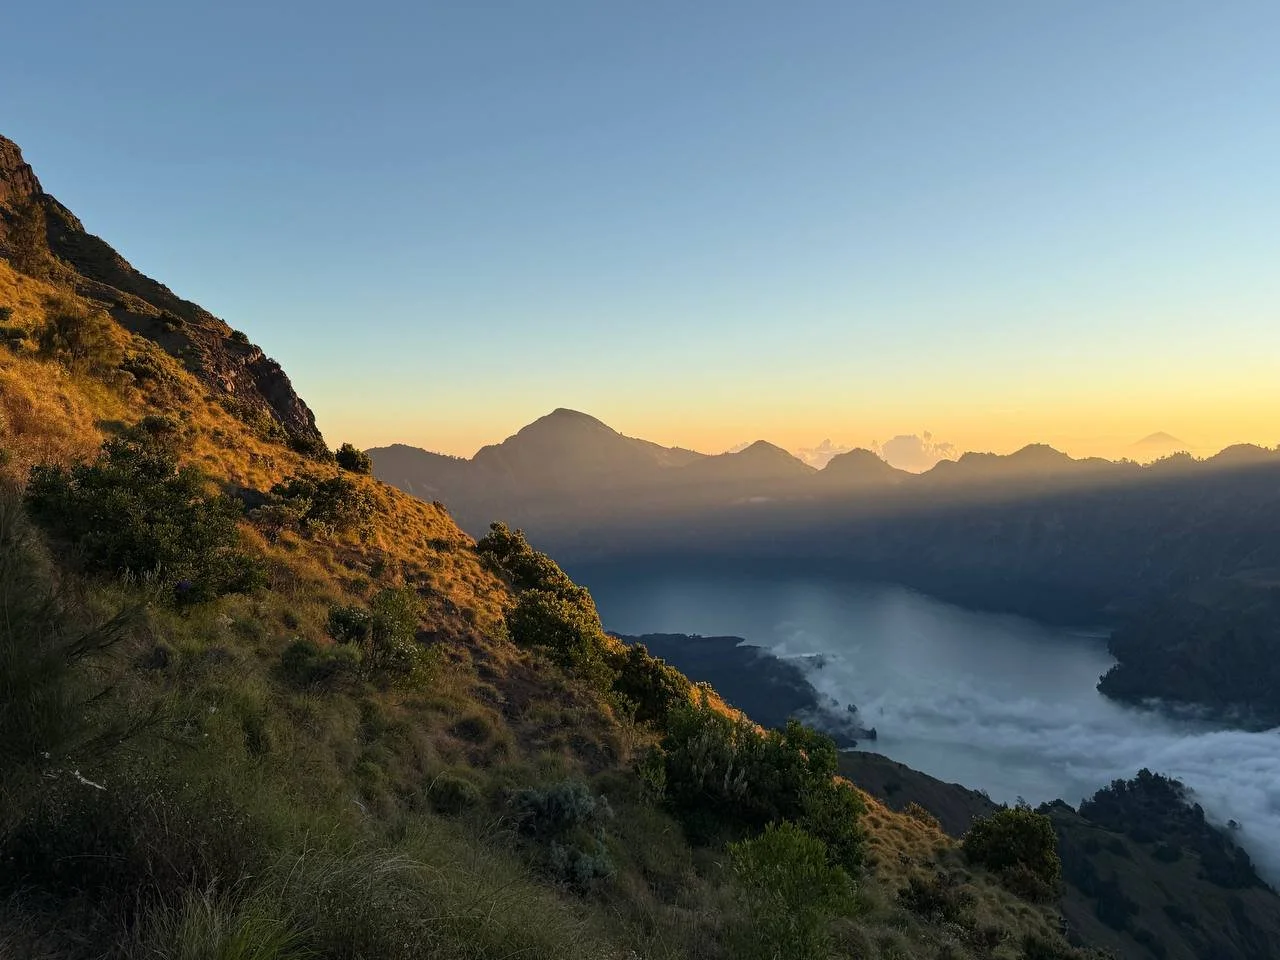
The Sembalun Crater Rim is one of my favourite photography locations on the entire trek. Arrive early and you'll be rewarded with stunning golden-hour light over the crater. After sunset, the campsite also becomes a fantastic location for photographing the stars thanks to the minimal light pollution.
Mount Rinjani Summit
Every climber wants the classic summit photo, and for good reason.
The iconic shot is standing beside the 3,726m summit sign with the dramatic crater and Segara Anak Lake in the background. If weather conditions are favourable, you'll also be able to see Mount Agung in Bali on the horizon.
Segara Anak Lake
If you're doing the 3D2N or 4D3N trek, you'll descend to Segara Anak Lake, where you'll have plenty of opportunities to capture wide-angle landscape shots of the turquoise crater lake surrounded by steep volcanic cliffs.
Camera Tips
If you're bringing a mirrorless camera or DSLR, I wouldn't recommend using a camera clip on your backpack for this trek.
The summit trail is extremely dusty, especially during the descent, and leaving your camera exposed means it will constantly be covered in fine volcanic dust. Instead, keep your camera safely protected inside your backpack and only take it out when you want to shoot.
It's a little less convenient, but it'll do a much better job of protecting your gear.
Final Thoughts
Mount Rinjani is one of the more challenging yet rewarding hikes in Southeast Asia. While the summit push is physically demanding, good preparation and having a complete Mount Rinjani planner makes the experience significantly more enjoyable as it allow you to spend less time worrying about logistics and better prepared to appreciate the incredible scenery around you.
If you're willing to prepare properly, pace yourself, and embrace the challenge, I'm confident Mount Rinjani will become one of the most memorable hikes you'll ever complete.
Planning Your Rinjani Adventure?
If you're serious about climbing Mount Rinjani, I've put together a complete Mount Rinjani Planner that includes:
My exact packing list
Rinjani trekking company i went with
Budget breakdown
Training plan
Photography guide
Gear recommendations
Printable checklists
Check out the link towards the guide once it’s out below!